Christmas Ornament Workshop

Make Your Own Christmas Ornaments

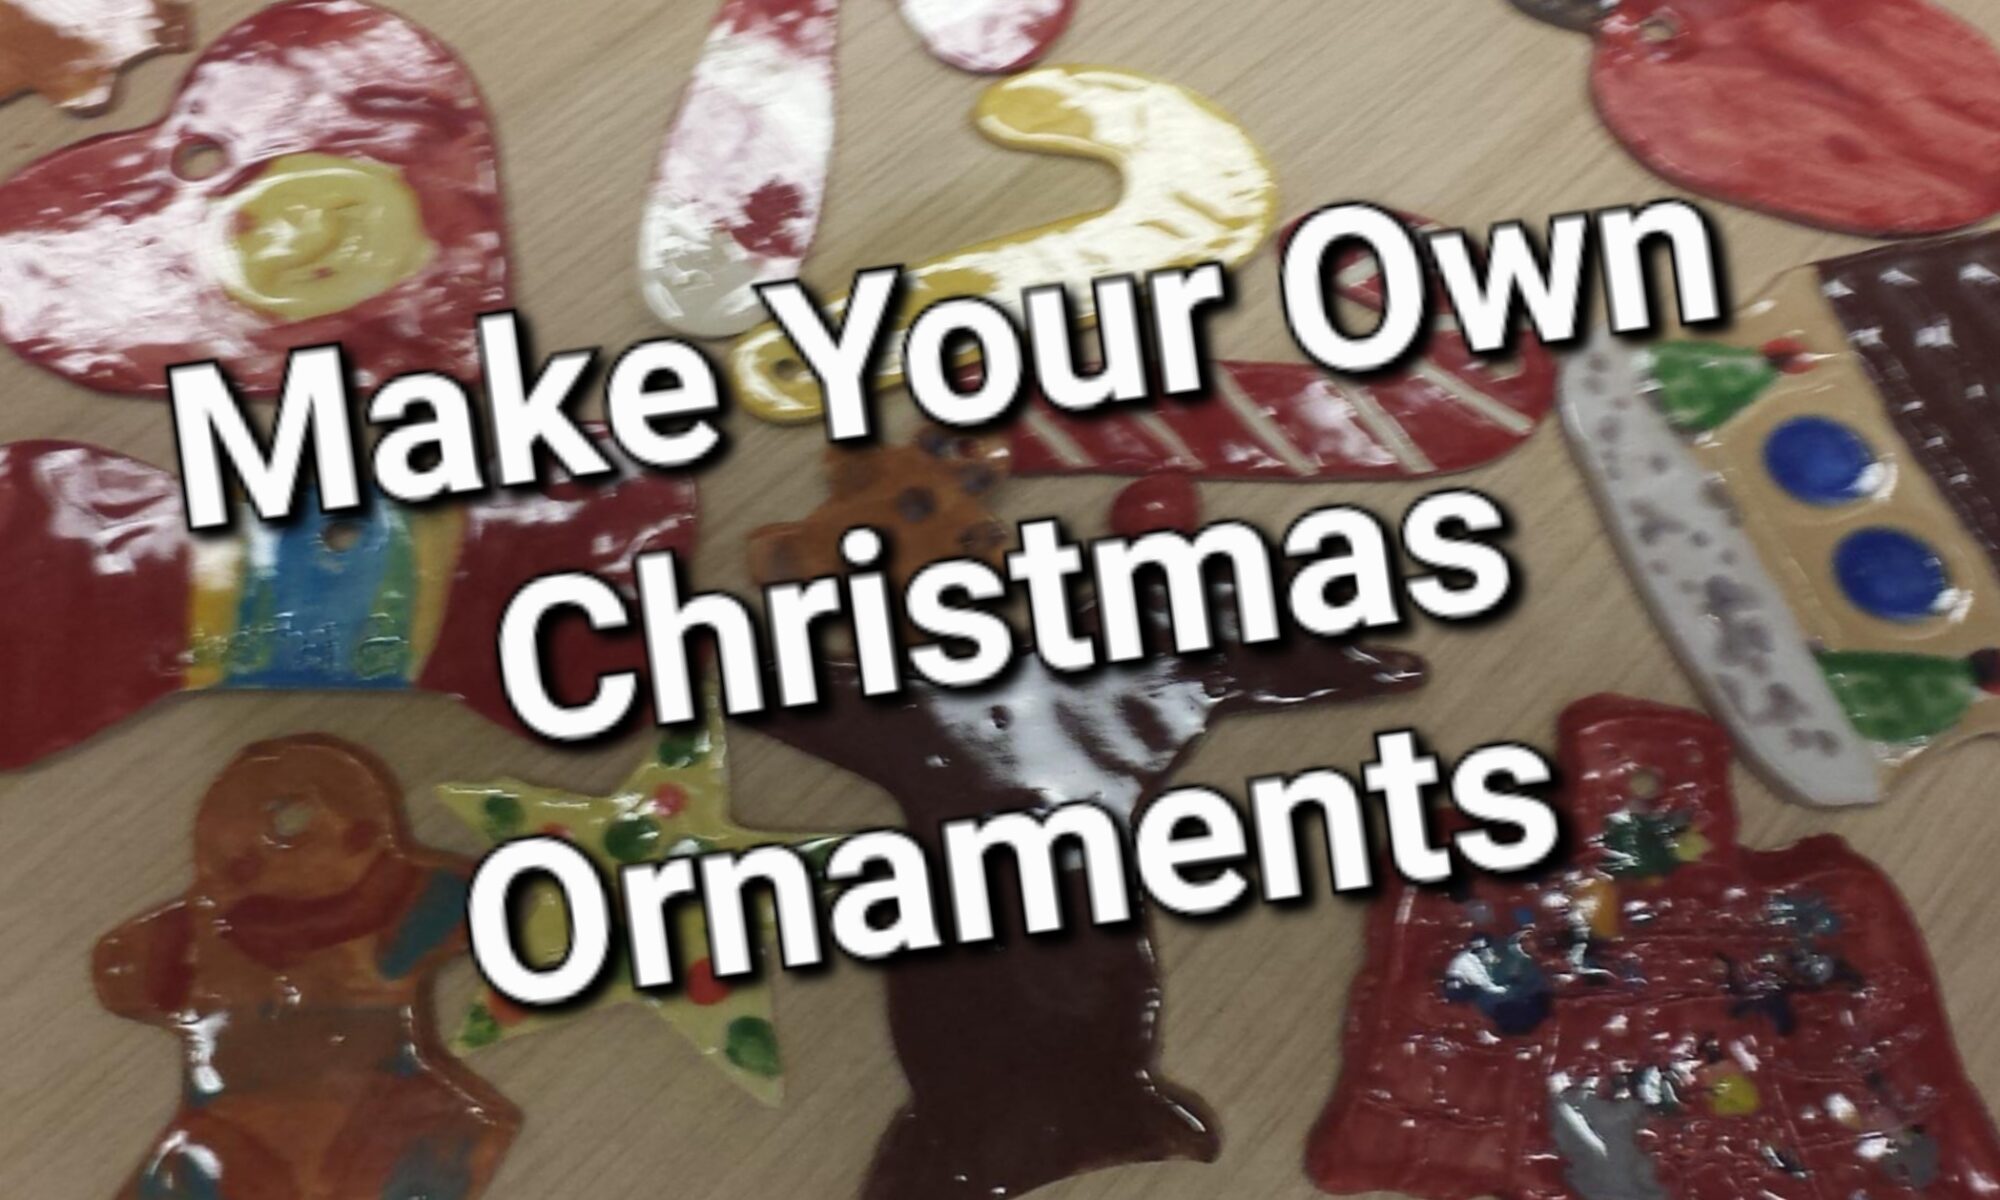
Its time for the Your Creation Station Christmas Ornament Workshop! Come to the studio on a “workshop” day to make your own Christmas ornaments out of clay, after they’re fired come back to paint them any other time we’re open. You’ll get a message when they’re ready to pick up and hang on your tree or give as gifts.

How It Works

Workshop Days

There are several designated Workshop Days through out November and into the first week of December to come in and make your Christmas Ornaments. We’ll have everything laid out and ready to roll when you get here. Hopefully, there will be extra staff on hand to help out as well. Reservations are not required. If you can’t make it on a workshop day, come by when you can and we’ll go from there.

Workshop days are highlighted in the calendar for November 2022 and December 2022. Check our full calendar to see all our upcoming workshops and important dates.

Workshop Calendar

Timing and Planning Your Visits

Plan for two trips to our studio to complete your ornaments and one trip to pick up the final project. It takes about two-three weeks from the day you make your ornaments to the day you can pick the finished pieces. There isn’t a time limit but expect to spend an hour, give or take, making your ornaments. Once your finished making your ornaments, its about a week before they are completely dried, bisque fired and ready to paint. Expect to spend more time painting your ornaments then you did making them. Once your ornaments are painted its no more than 8 days until they are ready to pick up.

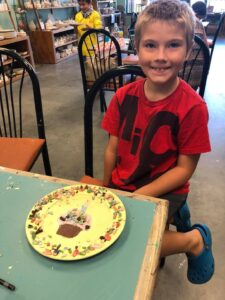
Making Your Ornaments

Making Ornaments
Use our cookie cutters or bring your own.

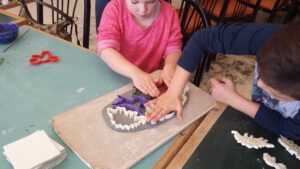
Making your own Christmas ornaments is a lot like making Christmas cookies. You get a pound of clay to roll out in our slab roller and then use the cookie cutters we have on hand to cut your ornaments. There are buckets of fabric, pieces of wood, pasta and other textures you can use to press into your ornaments to add interest or highlights. The number or ornaments you make depends on how big or small you make them. We’ve seen anywhere from 2 to 45 ornaments from a single pound, in general, expect between 12 and 15 Christmas cookie sized ornaments.

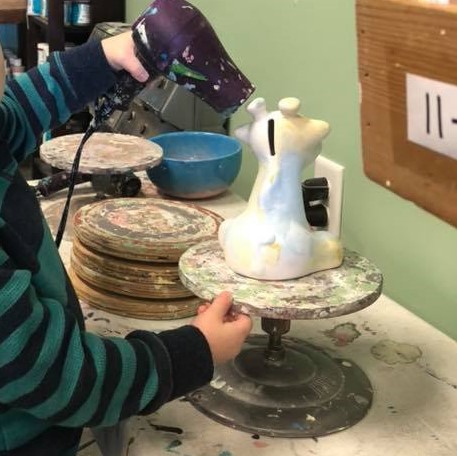
Finishing Your Ornaments

After you finish making your ornaments, you’ll leave them here to dry completely before we fire them the first time before you come back to paint them, in about a week. After you paint them we’ll glaze and fire your ornaments a final time and send you a message they’re ready for pickup.

Selected Group Canvas Painting Designs

Group canvas paintings are on a 9″ x 12″ canvas, square canvases shown here are adapted to fit. Some pictures (ex. the fish, the monsters, the sunflowers) are actually multiple canvases, they were just photographed together for simplicity.

These are only a few designs we’ve used before but we are open to most other designs ides you may have or come across. We generally look for a single subject or an open land/sea scape design allowing for painters to add their own unique touches. A single flower is much easier to paint than a field of sunflowers with a flock of birds flying overhead.

We’re shooting for everyone to paint the same thing but not necessarily the same way. For example, the fish are essentially the same shape but can be made to look quite different depending the painters preference. On beach scenes, painters can add dolphins, planes, starfish, etc. to their liking.

Bubble Painting Technique

This easy to do bubble painting technique creates a cool bubble effect on your finished ceramic pottery. Use it to create a background on your piece and then add other foreground elements by painting messages or images on top. You can even add a small add-on piece to give your creation a third dimension. Painting your ceramics with bubbles is also an easy project to work on at home. The kids will have a blast blowing bubbles and your project will look like a million bucks when it comes out of the kiln.

Painting with Bubbles How-To Video

Tools Needed for the Project

In addition to a piece of ceramics bisque and paints to work with you’ll need a few items you’ll most likely already have around the house.

  • Ceramic Bisque – While you can conceivably put bubbles on anything, pieces with lots of surface area, like plates or bowls, work well. Check out the selection of ceramic bisque on our online studio.
  • Cup or Small Bowl – You’ll need something to mix the paint, water and soap in to make your bubbles.
  • A Straw – For blowing bubbles. Any kind of straw will do.
  • Water – Essential for many things, in this project we’ll need it to thin the paint and soap and to complete the bubble broth.
  • Brushes – Although you don’t need a brush to produce the bubbles, you’ll need one to paint more stuff on you piece after the bubbles are on.
  • Clean Up Materials – What you’ll need to keep clean and clean up ultimately depends on you but you should plan on having some paper or cloth towels on hand. You may also want to put down some kind of table covering to catch.

Unplanned Kiln Maintenance to Effect Project Pickup

Kilns at Your Creation Station

The Title Says It All But Please Read on for More Information

Unfortunately, sometimes things happen when you don’t expect them – this is one of those times. We have two kilns at Your Creation Station and both of them picked this week to stop working. (I’m writing this on Thursday, November 20, 2020) We have parts to fix one (kiln elements) and we are waiting for delivery of the parts (relays) to fix the other.

The Good News

Kiln Elements and Holders
New kiln elements and ceramic holders.

The repairs are pretty straight forward but will require some time make. We expect the relays to arrive by Monday or Tuesday of next weeks and have that kiln fixed the day we get the relays. The other kiln is still hot and needs to cool before we can unload it to change the heating elements, we expect that kiln to be operational in two to three days.

The Bad News

If you made a piece of pottery, or glass last week or this week, you’re piece won’t be finished by the time we told you to expect it. While we expect to be able to fire at least one kiln by Monday, November 30, 2020, it will take some time to re-load, fire, re-unload, pack, notify and repeat for all the pieces over the last two weeks and those being completed this weekend. Once your pieces have been fired, we’ll send you an email and/or text message letting you know its ready to pick up.

When To Expect Your Pieces

We apologize for the inconvenience this has caused. While we try to anticipate events such as this, sometimes things still happen beyond our control. We fully expect to have everything fixed and caught up by this time next week, hopefully before that.

Thank you for your patience and understanding as we work to fix this problem.

Underglaze Color Chart

Color Chart at Your Creation Station

Here’s a picture of the Underglaze Color Chart at Your Creation Station.

The Underglaze Color Chart at Your Creation Station. Each tile has three stripes, roughly equal to one, two or three coats, to show how the color becomes less translucent the thicker it is applied.. Click on the chart to open the full sized image in a new window.

The tiles are grouped by color with warm yellows, oranges and reds on the left, cooler purples and blues in the middle followed by the greens, and neutrals all the way to the right. The number in the top right corner of each tile indicates the product number for that underglaze. We use that number to identify exactly which color we want to use. Click on the image for full sized view.

New Colors Available

On election day, 2020 Duncan Enterprises was bought by Mayco Colors and the Duncan Concepts Underglaze and specialty glaze lines, the paints we used at Your Creation Station, were discontinued. From a pottery perspective, this was like Apple buying Google and then stopping production of Android phones. As the Duncan colors eventually sold out, Your Creation Station made the switch and while we still have some of the old colors and glazes left, we’re mostly all switched over.

Translucent Colors

All of the colors in this particular line of underglazes are translucent and become more opaque the thicker they are applied. Looking at each tile individually, you’ll notice each has three stripes. From top to bottom, each stripe is about equal to one, two and three coats. Where the glaze is thinner on the top, you can see the color of the bisque showing through as well as the brush marks in the underglaze. As the underglaze gets thicker, the brush marks tend to be less noticeable and less of the bisque is visible.

Work In Layers

The key to getting the look you want is to remember you are applying the material in layers and you need to allow one layer to dry before applying the next. Remember these colors aren’t like acrylic paints, the underglaze is made up of tiny particles floating in water and the bisque is very porous, like a sponge. The bisque absorbs the water from the underglaze leaving it where you painted. Painting more while the layer is still wet actually removes more glaze than it puts on. Its OK to paint one color on top of another but remember the colors are translucent. Its easier to cover a lighter color with a darker color than the other way around.

Dry Between Layers

Small Hands Drying a Giraffe Bank
Use the cool or low setting on the hairdryer to keep from drying to fast.

It doesn’t take long for the underglaze to dry enough to touch, in fact, once the initial sheen disappears, you can touch the piece without worrying about the underglaze coming off. At this point, if its your first coat, you can probably start the next coat without too much trouble. However, the more you paint, the longer it will take for the underglaze to completely dry, remember the bisque is like a sponge and it will hold the water and dry slowly. If you don’t want to wait for the piece to dry by itself, you can put it out in the sun or use a hair dryer. If you do use a hairdryer, use the low setting, sometimes cracks appear in the underglaze if you dry them too fast.

Work Area and Clean Up

You can paint your pottery with these underglazes almost anywhere. You can work at the kitchen table, on newspaper or not. Our underglazes clean up easily with a water and a sponge. They don’t stain and come out of hair, clothes and skin easily. If fact, if you get some on your shirt, you’ll be able to brush most of it away once it dries. The underglaze will be more difficult to clean on more porous surfaces, like untreated wood. In our studio we work on laminate top tables from the old Howard Johnson’s in Dover. We use a big grout sponge to wipe the big stuff off the table before going back with spray cleaner and a clean paper towel to get up the remaining dust.

Story Time in October

More Stories – More Times – More Days

Boy Finished Painting a Cupcake Plate
Can’t wait to see how it comes out!

We’ve picked a bunch of great books and pieces for Story Time in October at Your Creation Station. Each Thursday morning at 10:30 AM, we’ll read a story and then paint a piece of pottery to match the characters in the book.

We’ve also added two Saturday Story Times for families that can’t make it to a Thursday Morning Story Time. If that wasn’t enough…we’re having a Pajama Time Story Time too! Saturday Morning Story Time starts bright and early at 9:30 AM while our Pajama Story Time is in the evening so you can go straight to be after.

How To Participate

Its easy to attend a Story Time at Your Creation Station. All you need to do is sign up online and then show up. During sign up, you’ll select the number of spaces you’d like and if there are any options for choosing what piece to paint, you can select your choice then.

If you’re not sure if you can make it and don’t want to sign up before hand…no problem…walk ins are always welcome. Pieces and spaces are sometimes limited and available on a first come first serve basis, so if you want to be sure you have a spot, we encourage you to sign up ahead of time.

Thursday Morning Story Time

Click the Add to Cart button to sign up for Story Time on any Thursday morning. The story starts at 10:30 AM.

Saturday Morning Story Time

It may seem early for a Saturday but after the story, you’ll have the whole rest of the day. Find our how the tooth fairy manages to evade all the toothless children trying to catch her. Story starts at 9:00 AM.

Pajama Time Story Time

Come to story time dressed in your pajamas! We’re reading How Do Dinosaurs Say Goodnight and painting a dinosaur. After your finished, you can go home or go right to bed. Story starts at 6:30 PM.

Light Up Pottery Pre-Order Extravaganza

Light Up Pottery Extravaganza

A few weeks ago we added the ability for our customers to pre-order a popular Christmas piece (the Vintage Truck with Tree Light Up) and the response was great. Since one good turn deserves another, we’re making the offer again PLUS we’re increasing the number of items available. For this Pre-Order event, we’re offering pieces that light up!

How It Works

Choose the pieces you want, add them to the cart and complete the check out process. During checkout, you’ll be able to specify if you want to paint the pieces at home or in the studio. If you want to paint at home, please specify what colors you want in the note section during checkout. After the pre-order period is over, we’ll order the pieces and send you a message when they come in.

What to Expect

Once you complete checkout, you’ll receive a confirmation of your pre-order by e-mail. Your credit card will be charged upfront for the piece you ordered. When the pieces arrive from our supplier, we will send you another e-mail and/or text message that its ready to pick-up. Please be sure you want the piece when you order it. All Sales Are Final – No Refunds. If for some reason (supplier is out of stock, pieces arrive broken, etc) and we can not get the item we will offer a refund.

Light Up Pottery Pieces

Making Stepping Stones

Stepping Stones

Our stepping stone kit is fairly easy to put together once you get it home. The basic steps are to mix up your cement, arrange your design and let it dry.

You’ll need to find somewhere to work where you won’t mind mixing cement and water. This isn’t a inherently messy process but messes happen. Putting down some plastic or newspaper makes for easy clean up too. You can do it in the kitchen or you can do it in the yard.

Mixing Your Cement

The first step in completing your stepping stone is to mix up the cement. The process is fairly easy and straight forward. Your kit comes with a bag of cement and a tin pan. We’ll use the tin pan to mix the cement.

  1. Empty the entire contents of the cement bag into the tin pan.
  2. Add 1 cup of water to the cement
  3. Mix the water and cement with your hand until its smooth. All the cement should be wet, no clumps.
  4. Smooth out the cement and gently shake the tin pin from side so its flat. Lift the tin pan slightly off your work surface and gently drop it to get any air bubbles out. No need to drop if far, just enough so the air bubbles come to the top and pop. It may take a few tries to get them all.

Design and Build

Here’s the fun part. Your kit comes with a set of mosaic pieces we made by hand right in our studio. Arrange the pieces in the design you selected and then gently push them into the cement. Sometimes we’ll wiggle the pieces a little as we’re pushing. The top of each piece should be even with the top of the cement. Once they pieces are in just let them be.

Drying Your Stepping Stone

Now that all the work is done, here’s the hard part, you’ll have to keep your new stone in the tine container a good 3 to 5 days it to completely dry and harden. Cement goes through a hydration process where the the calcium and other materials in the cement react with the water to bind everything together. Seems like magic but its really chemistry. In any case, that takes time. As the stepping stone drys its a good idea to pour a little water on it to help it cure. Once the stone is completely dry, take it out of the tin and put it in your garden.

Pickup Delayed Until June 21, 2020

Good morning,

Unfortunately, we had an issue getting the kiln fired last night and project scheduled to be completed and picked up for today, June 20, 2020 will not be ready. If you received a message with a link to this post, your project was included in this kiln load.

As of now, just before noon, the kiln is heating up and we expect it to be finished and cool enough to unload by tomorrow morning. I plan on being at the studio early Sunday, approximately 8 AM, to open and unload and will send a message to everyone when we’re sure we can unload pieces without them breaking.

I realize many projects in the kiln are gifts for Father’s Day and I and I can’t apologize enough for not having them ready on time. Handmade gifts are among the most cherished and we try our best to make sure things are ready when we say they will be, unfortunately we missed the mark today. Again, my sincerest apologizes.

Steve

Story Times Past – Playlists

Story Time Reading Screenshot

Living Happily Every After on YouTube and Facebook

When we had to close our studio to walk in customers in March 2020, we didn’t want to stop doing our Story Times, they were a lot of fun. So, we started broadcasting them live on our Facebook page. Once we got into the groove of it, we went back and recorded all the stories we read live in person and posted the videos to our YouTube channel. Then we started recording them after broadcasting them live. Then we had to do something with them, so we made some playlists and posted them on social media where they’ll live as happily ever after as a video file for everyone to watch.

Facebook and YouTube Video Story Time Playlists

There’s a couple things to note about the playlists. The YouTube Playlist includes all the stories we’ve read from when we first started this series, the Facebook Playlist only starts in the last week of March. Mostly because of our setup and skill level, remember – we’re potters, not video producers, the recordings are smother than the video from our live broadcast. Both lists are fun to watch.

Story Time Companion Pieces

If you want to paint one of the companion pieces that goes along with the story, you can purchase individual pieces from our online studio or choose any three, in stock, companion pieces and get each for the original Story Time price, a 25% savings.

YouTube Playlist

Facebook Playlist

If no video appears below, please go directly to our Facebook Story Time Playlist to find all our stories..

https://facebook.com/YourCreationStation/playlist/1342311029292730
Facebook Story Time Playlist
https://business.facebook.com/YourCreationStation/videos/274541996887261/
A sample of what’s on our Facebook Video Story Time Playlist