
Here’s a picture of the Underglaze Color Chart at Your Creation Station.
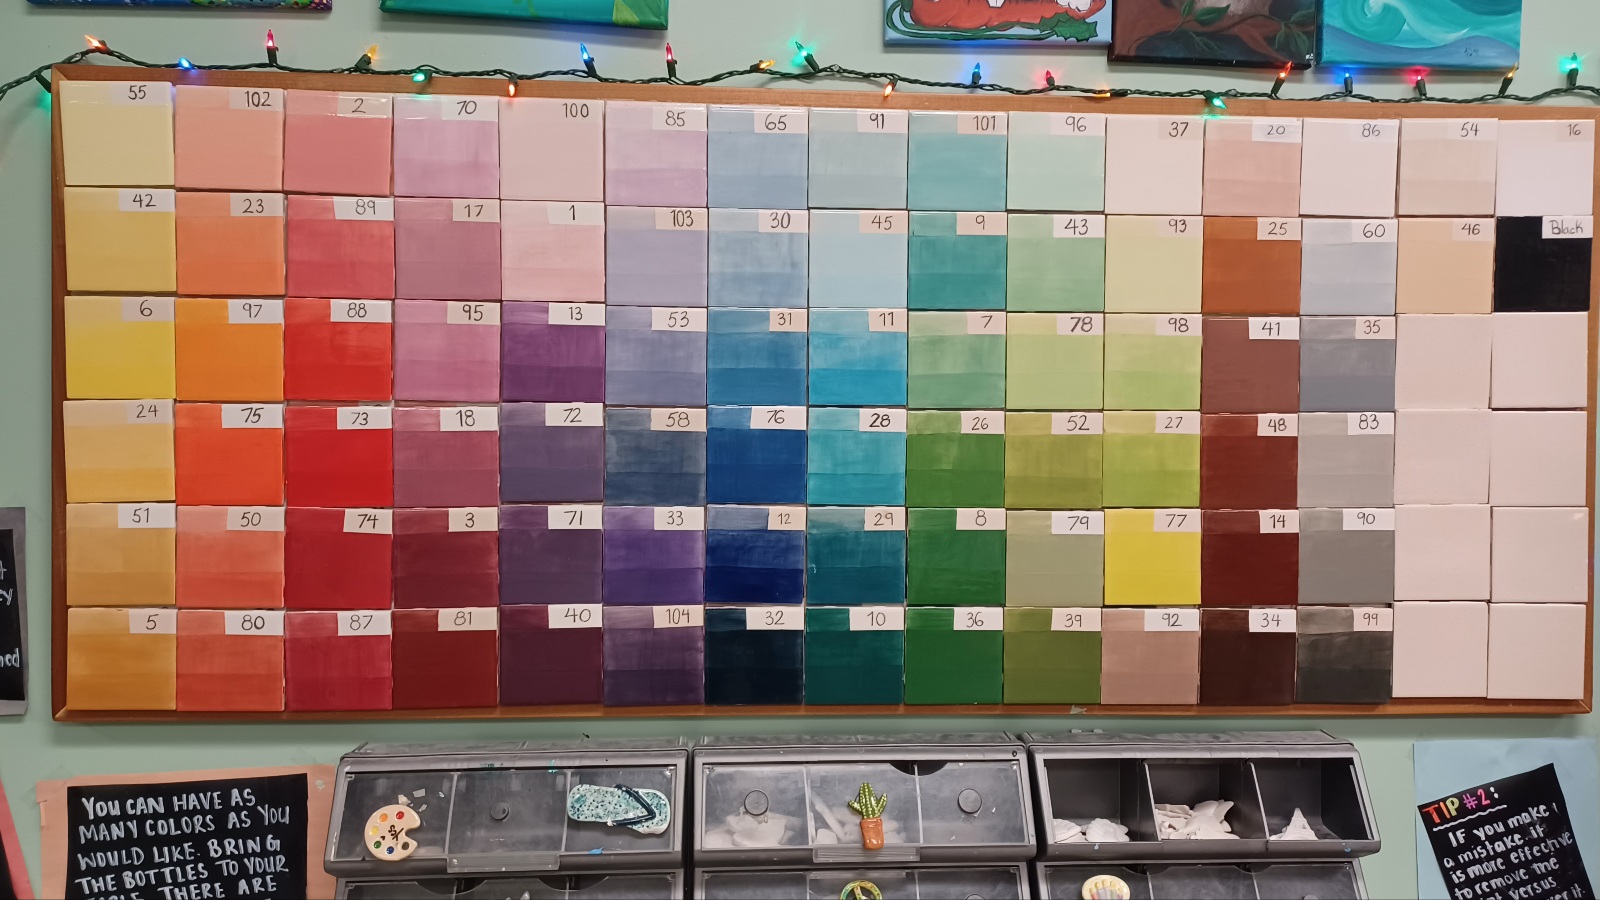
The tiles are grouped by color with warm yellows, oranges and reds on the left, cooler purples and blues in the middle followed by the greens, and neutrals all the way to the right. The number in the top right corner of each tile indicates the product number for that underglaze. We use that number to identify exactly which color we want to use. Click on the image for full sized view.
New Colors Available
On election day, 2020 Duncan Enterprises was bought by Mayco Colors and the Duncan Concepts Underglaze and specialty glaze lines, the paints we used at Your Creation Station, were discontinued. From a pottery perspective, this was like Apple buying Google and then stopping production of Android phones. As the Duncan colors eventually sold out, Your Creation Station made the switch and while we still have some of the old colors and glazes left, we’re mostly all switched over.
Translucent Colors
All of the colors in this particular line of underglazes are translucent and become more opaque the thicker they are applied. Looking at each tile individually, you’ll notice each has three stripes. From top to bottom, each stripe is about equal to one, two and three coats. Where the glaze is thinner on the top, you can see the color of the bisque showing through as well as the brush marks in the underglaze. As the underglaze gets thicker, the brush marks tend to be less noticeable and less of the bisque is visible.
Work In Layers
The key to getting the look you want is to remember you are applying the material in layers and you need to allow one layer to dry before applying the next. Remember these colors aren’t like acrylic paints, the underglaze is made up of tiny particles floating in water and the bisque is very porous, like a sponge. The bisque absorbs the water from the underglaze leaving it where you painted. Painting more while the layer is still wet actually removes more glaze than it puts on. Its OK to paint one color on top of another but remember the colors are translucent. Its easier to cover a lighter color with a darker color than the other way around.
Dry Between Layers
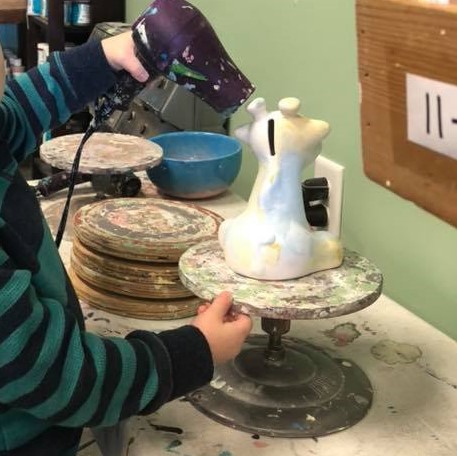
It doesn’t take long for the underglaze to dry enough to touch, in fact, once the initial sheen disappears, you can touch the piece without worrying about the underglaze coming off. At this point, if its your first coat, you can probably start the next coat without too much trouble. However, the more you paint, the longer it will take for the underglaze to completely dry, remember the bisque is like a sponge and it will hold the water and dry slowly. If you don’t want to wait for the piece to dry by itself, you can put it out in the sun or use a hair dryer. If you do use a hairdryer, use the low setting, sometimes cracks appear in the underglaze if you dry them too fast.
Work Area and Clean Up
You can paint your pottery with these underglazes almost anywhere. You can work at the kitchen table, on newspaper or not. Our underglazes clean up easily with a water and a sponge. They don’t stain and come out of hair, clothes and skin easily. If fact, if you get some on your shirt, you’ll be able to brush most of it away once it dries. The underglaze will be more difficult to clean on more porous surfaces, like untreated wood. In our studio we work on laminate top tables from the old Howard Johnson’s in Dover. We use a big grout sponge to wipe the big stuff off the table before going back with spray cleaner and a clean paper towel to get up the remaining dust.